Background story / motivation One night, I opened my garage door to take out the trash. Then I came back in and went to bed. The next morning, as I was strapping my son into his car seat, he asked me, “Daddy, why is that exercise ball over there?” “What? What exercise ball?” “That one. Who put that ball there?” I replied without looking, “I don’t know, I didn’t put it there.” He said, “Maybe mama put it there.” “Maybe she did.” “Maybe it fell.” I looked back and saw it in the middle of the floor. Strange. Didn’t seem like her to leave it like that. Then I looked around. My toolbox was gone. I looked left. My bicycle was gone. I peeked into my wife’s car. Every compartment was open and trashed.
I had left the garage door open and we had been robbed.
Since then, whenever I left the house, I found myself checking and double-checking the garage door. And sometimes even after triple-checking… I would drive back to check ONE MORE TIME. Because you can’t be too sure. Even when I was home, I found myself constantly peeking into the garage to make sure I didn’t leave the door open again.
It was driving me nuts. So I decided to do something about it. If you’re like me, this weekend project will finally give you some peace of mind. If you’re handy with electronics and code, you could even get it done in one evening. When you’re done, you’ll get to open your garage door from your phone. And best of all, you’ll always know if your door is open or closed.
(By the way, before going for this solution to the garage door problem, I considered leaving my garage door open again. I really wanted to set a trap to destroy whoever dared to rob me again. But my wife said no. So here’s just some instructions for a garage door opener… instead of an automated crossbow turret.)
Parts list
Total: $44.75
Tools list
Finished pictures
[caption id=”attachment_309” align=”alignnone” width=”768”]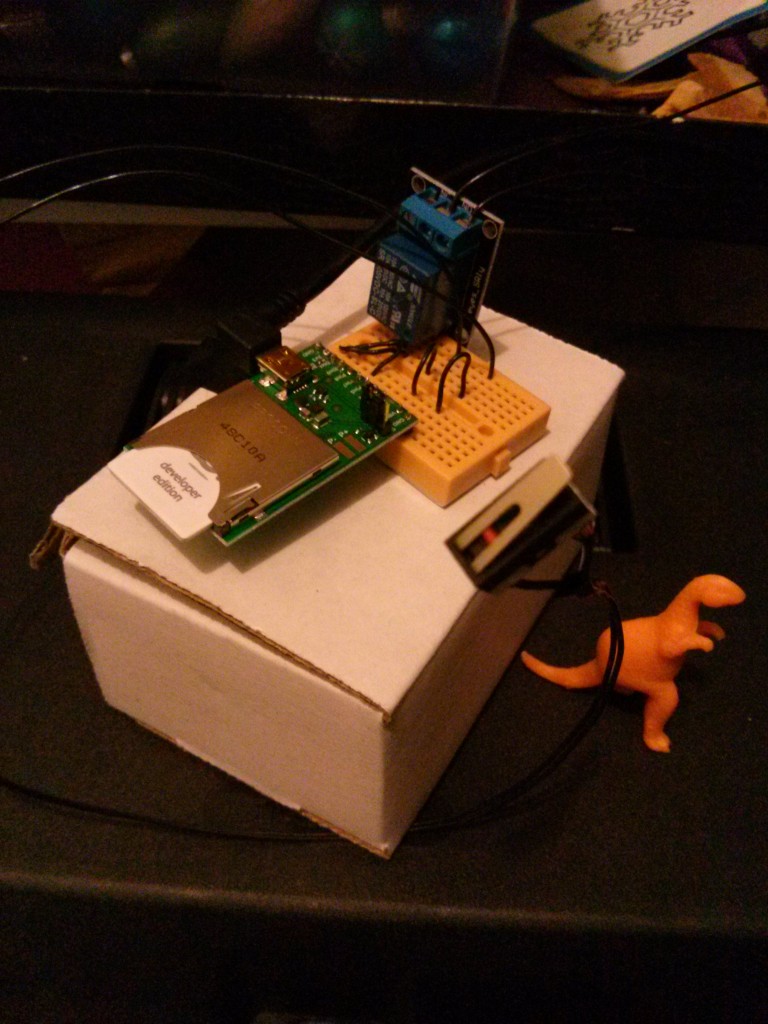 Mini breadboard ties everything together. The Imp is sitting in the April Breakout board. The April board’s soldered header pins plug into the breadboard. The blue thing is the relay with 3 pins in the breadboard. You see a switch in the picture but I replaced that with an Ultrasonic sensor. The problem with the switch was my garage door doesn’t always stop at the same place, so no switch was going to reliably trigger. On the other hand, the Ultrasonic sensor measures accurate distances up to 3m, so you can make a software switch that you can tune to perfection. Dinosaur for scale.[/caption]
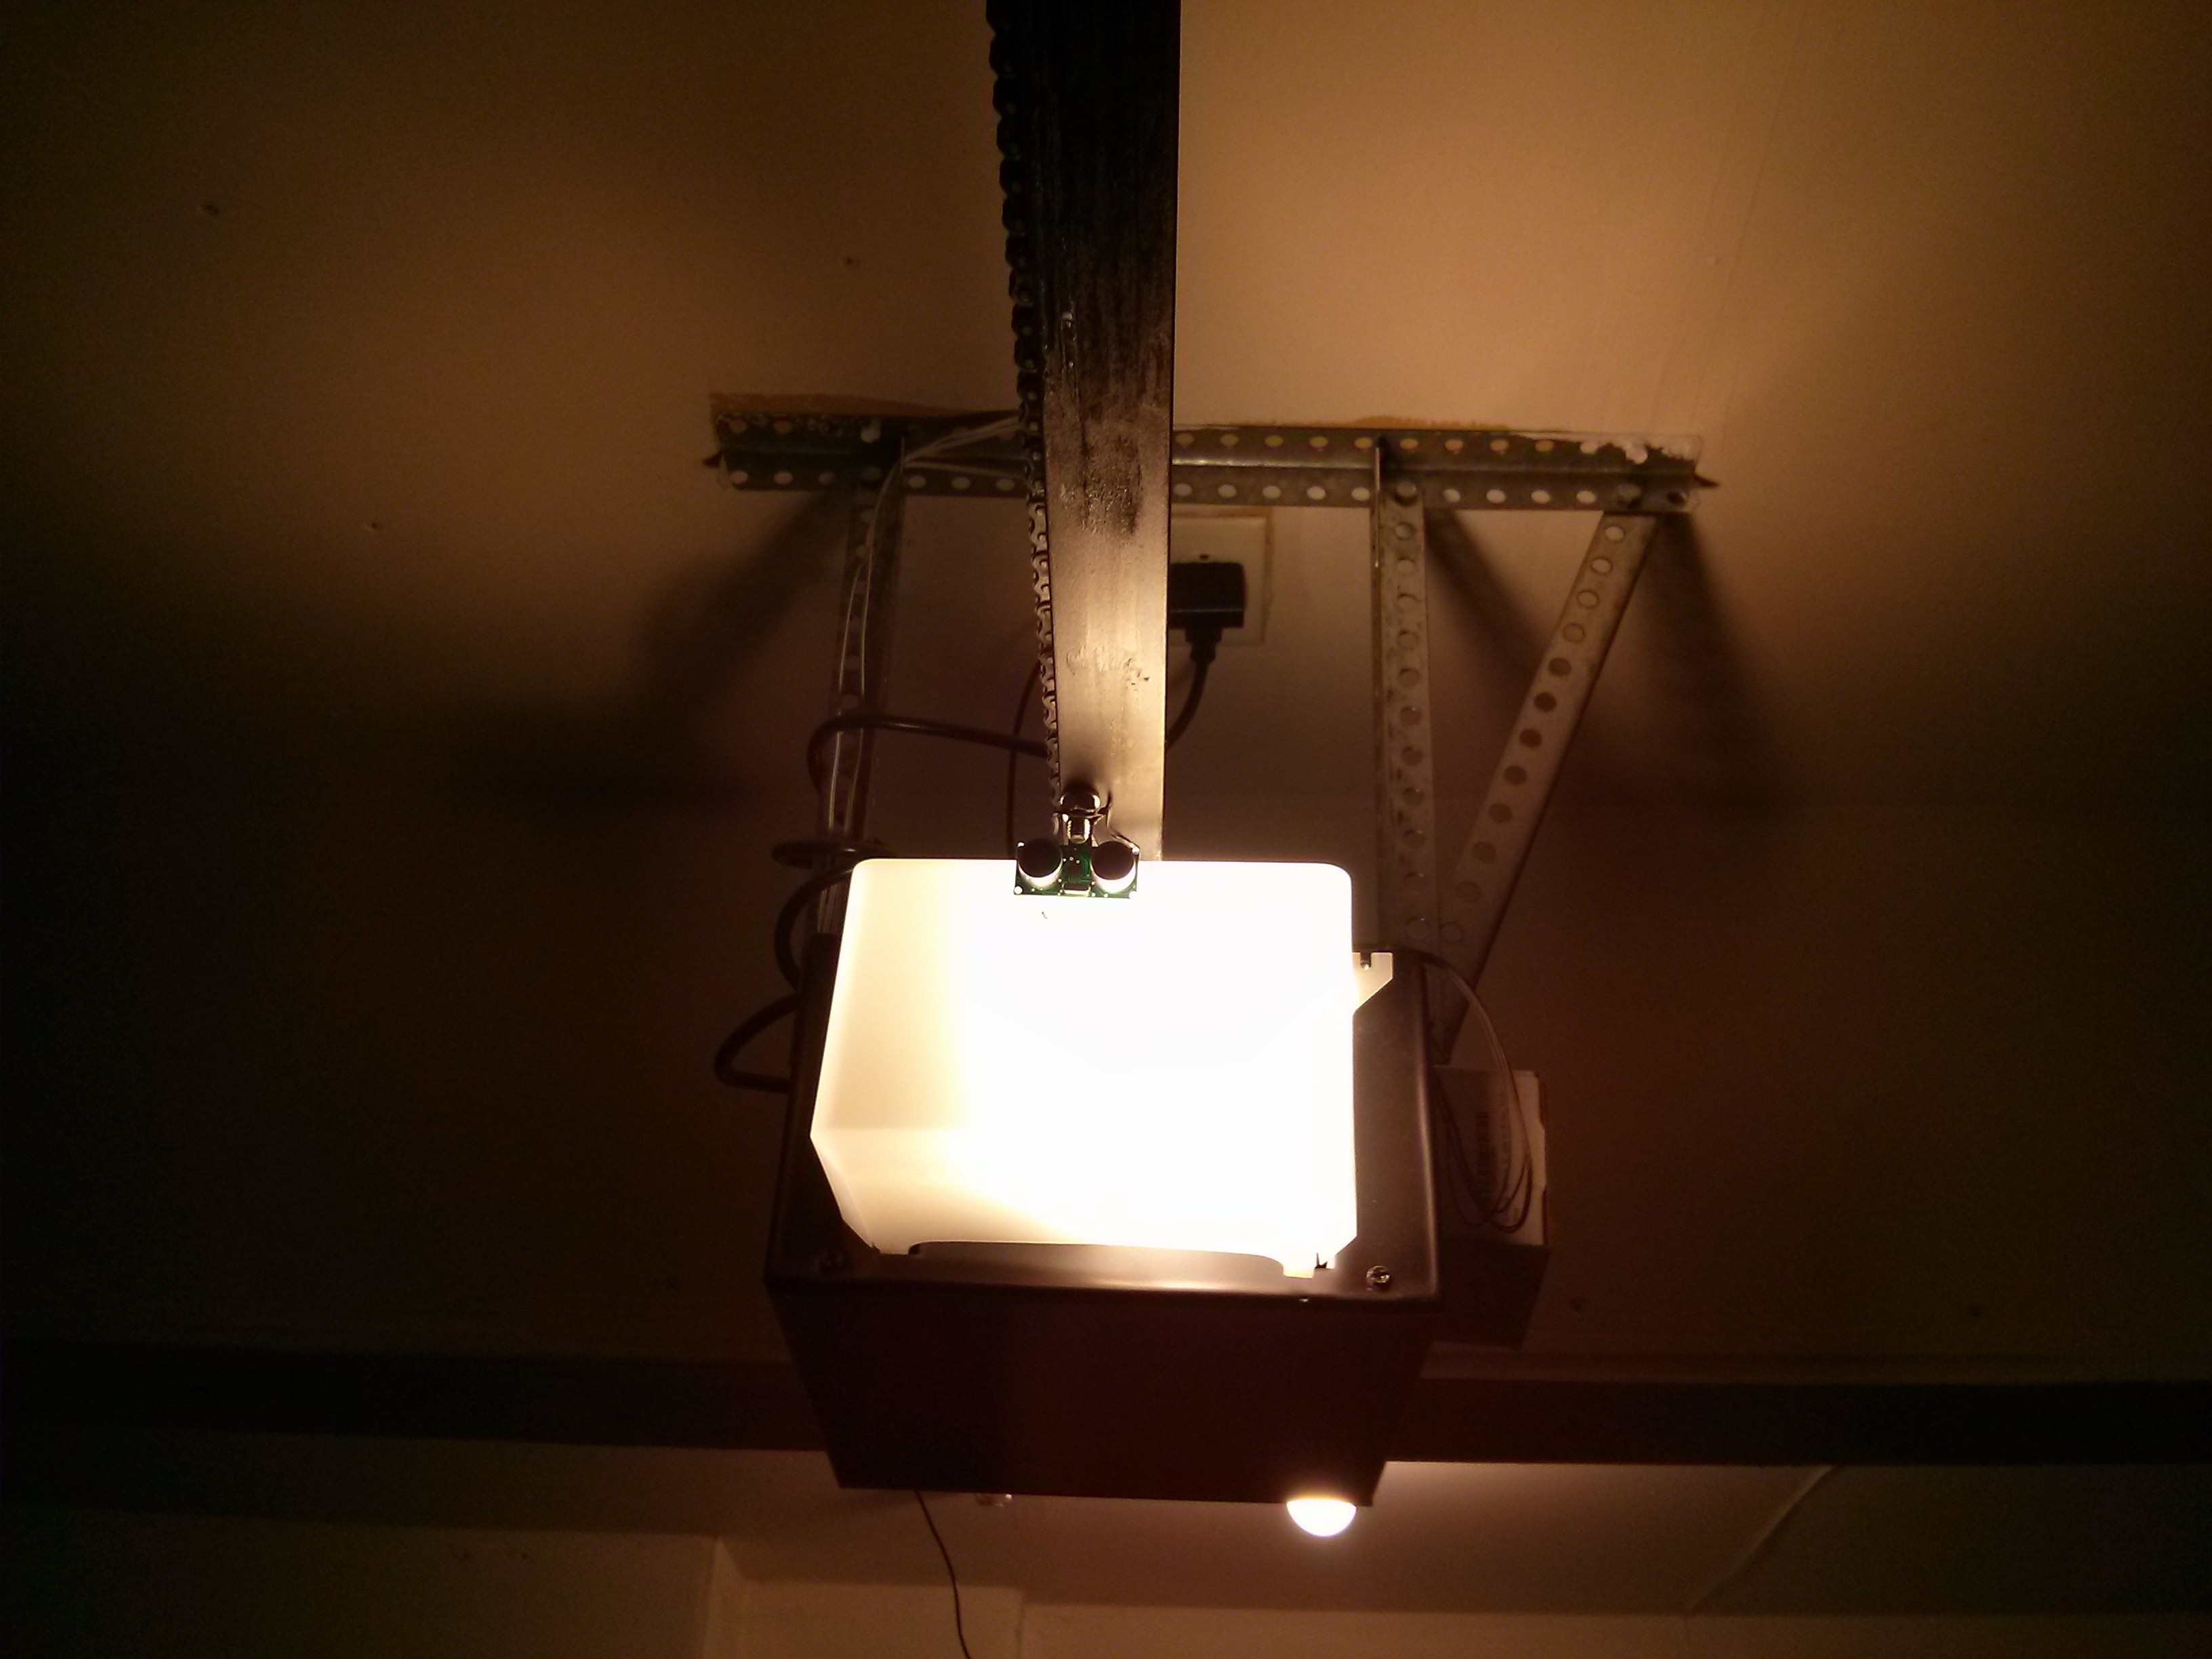
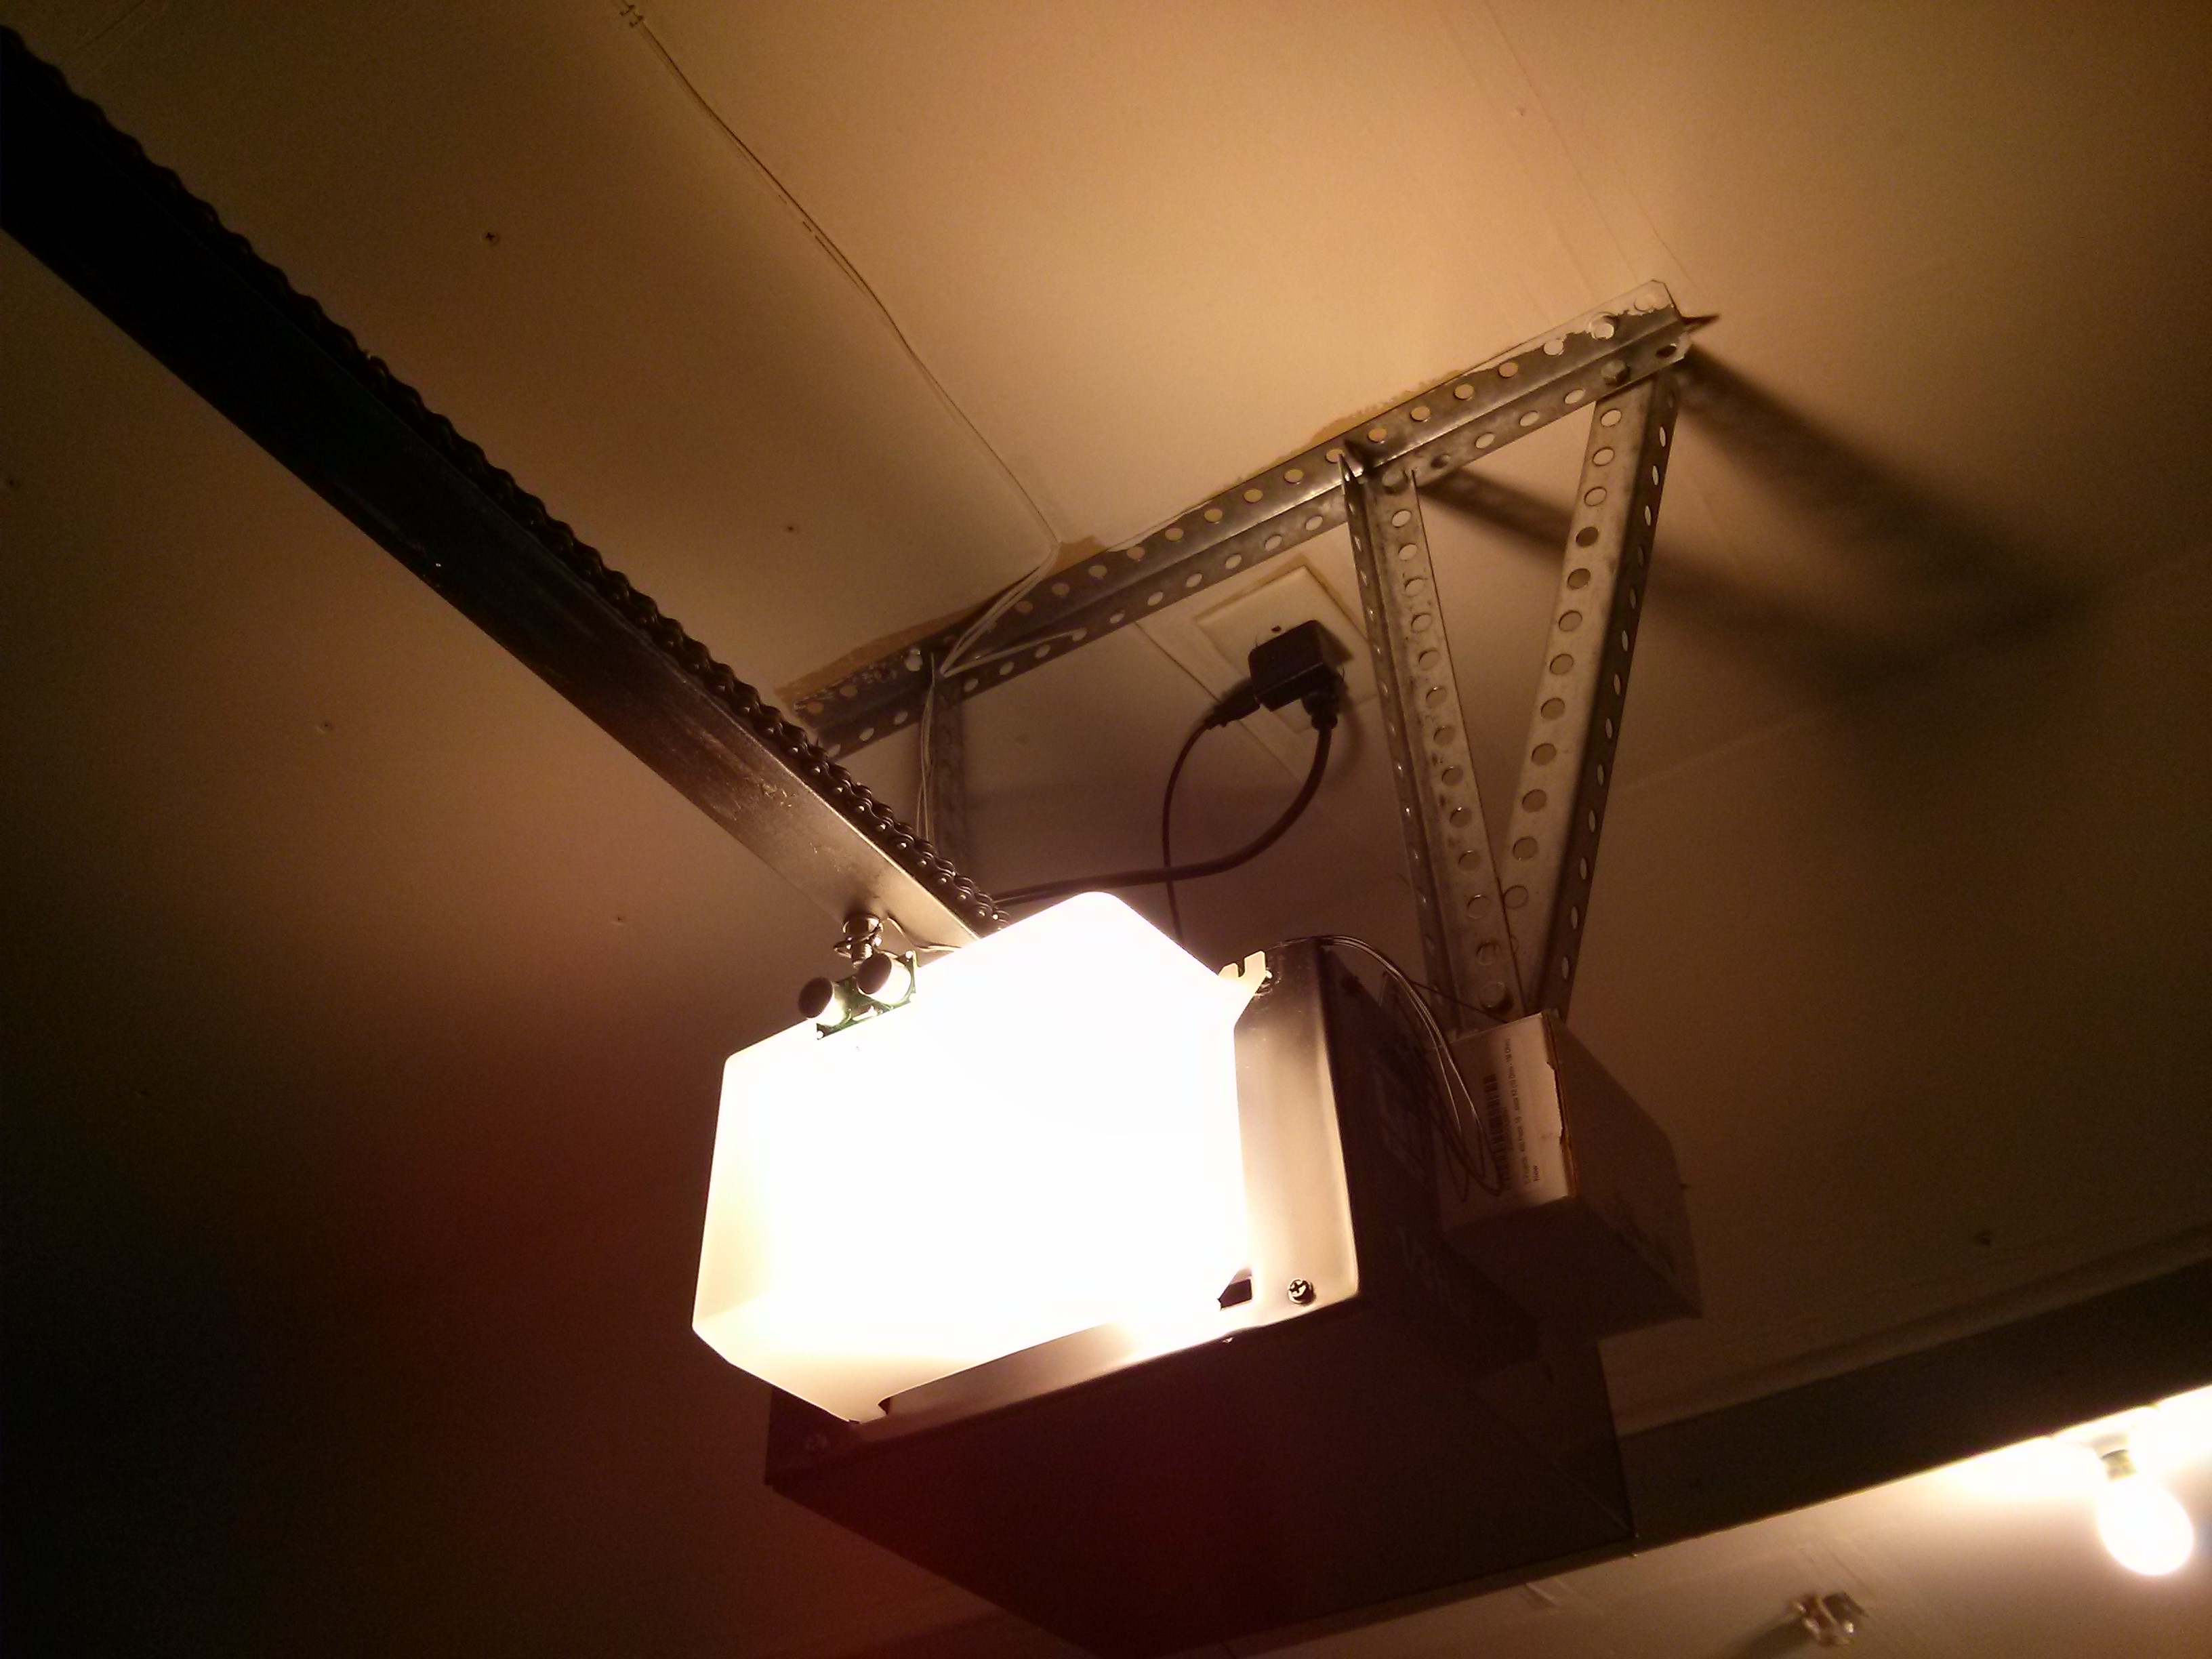
[caption id=”attachment_328” align=”alignnone” width=”300”]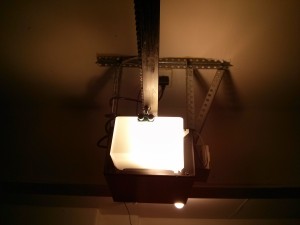 I SEE YOU, garage door[/caption]
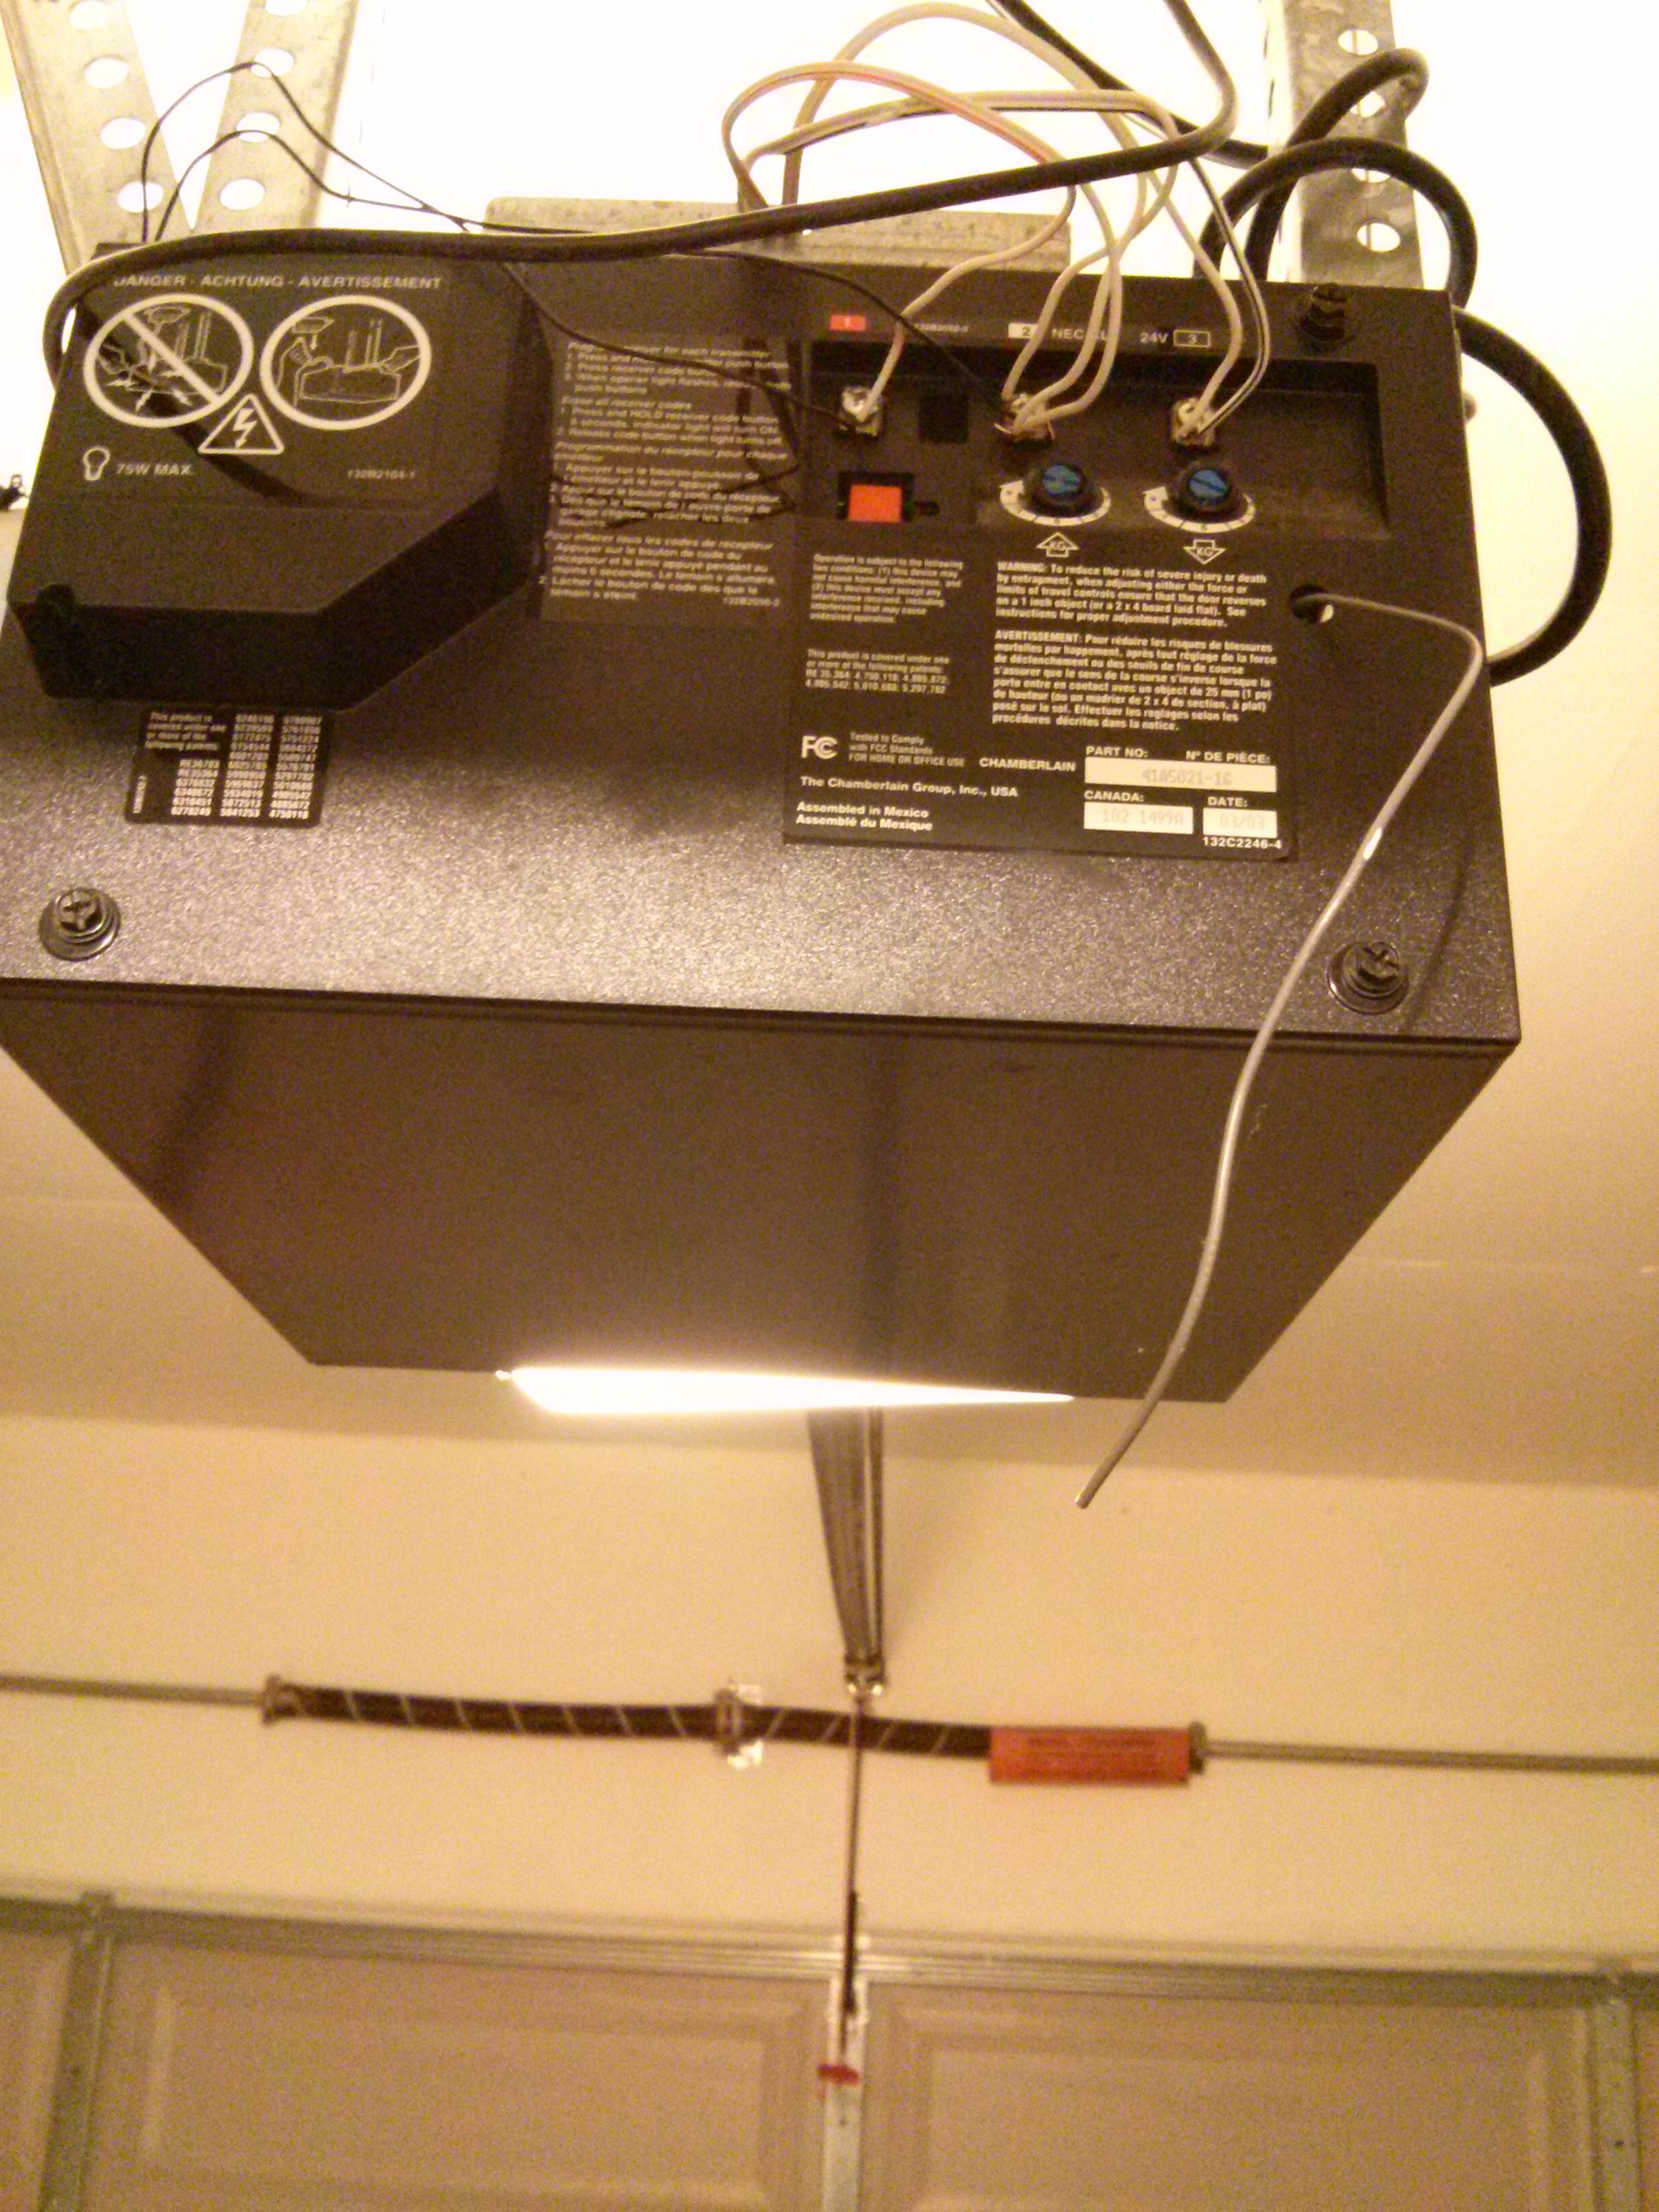
[caption id=”attachment_327” align=”alignnone” width=”300”]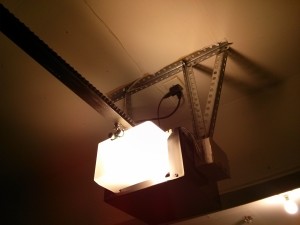 Goodies tucked into small cardboard box on the side. USB power from ceiling.[/caption]
[caption id=”attachment_326” align=”alignnone” width=”225”]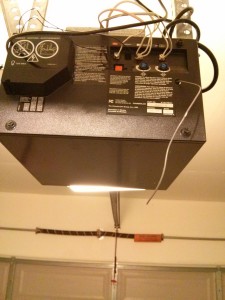 The tiny black wires connect the relay to the same terminals used by the wall switch.[/caption]
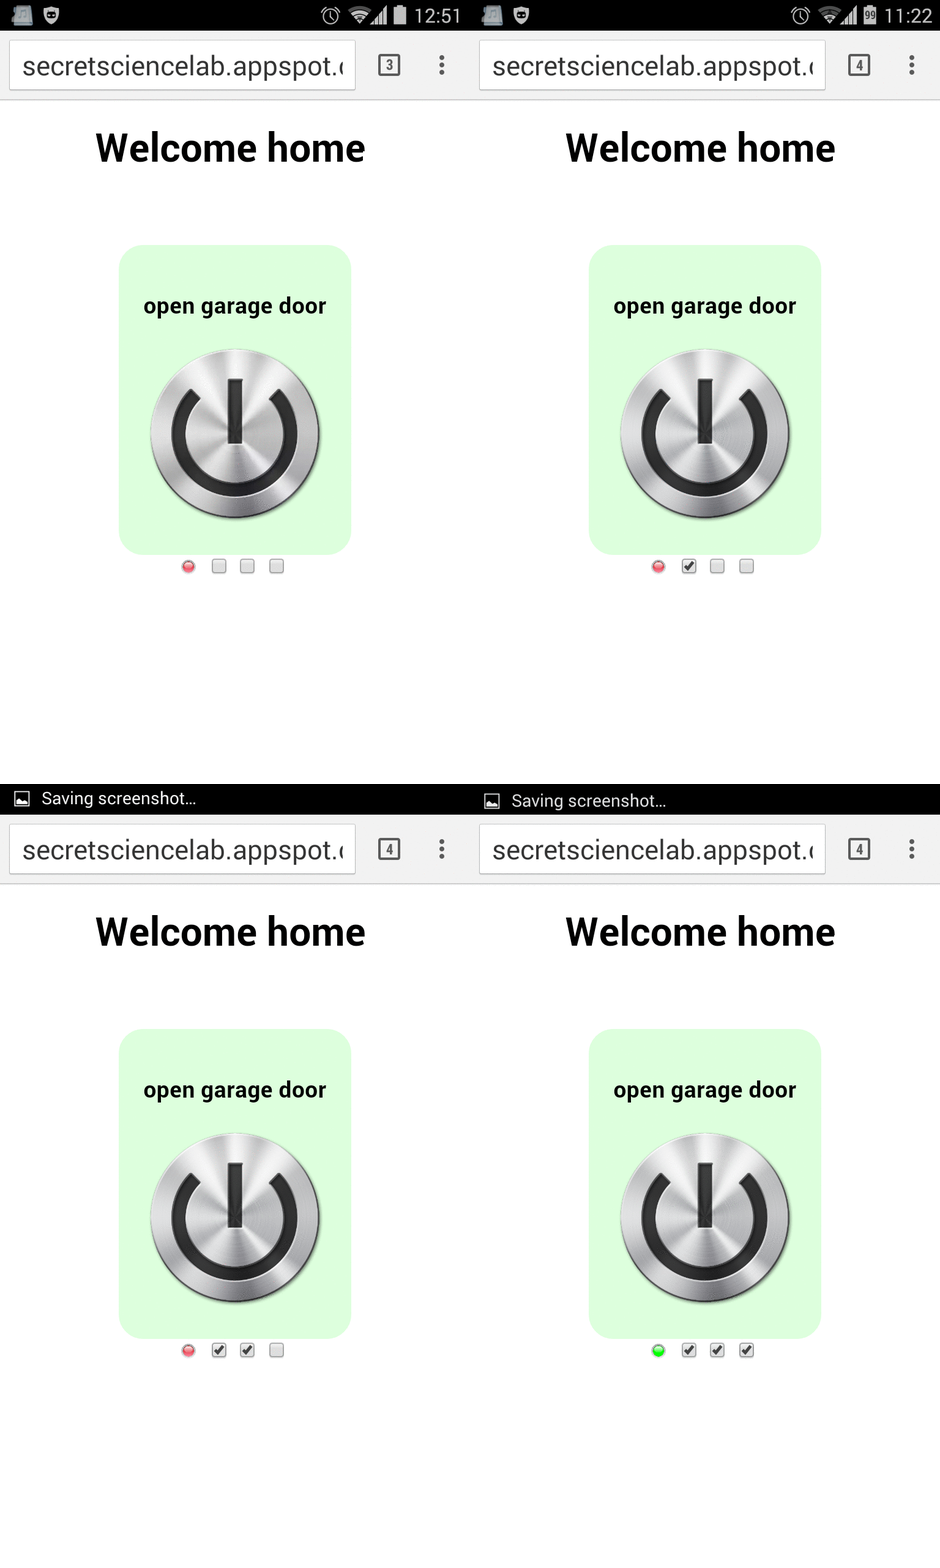
[caption id=”attachment_350” align=”alignnone” width=”614”]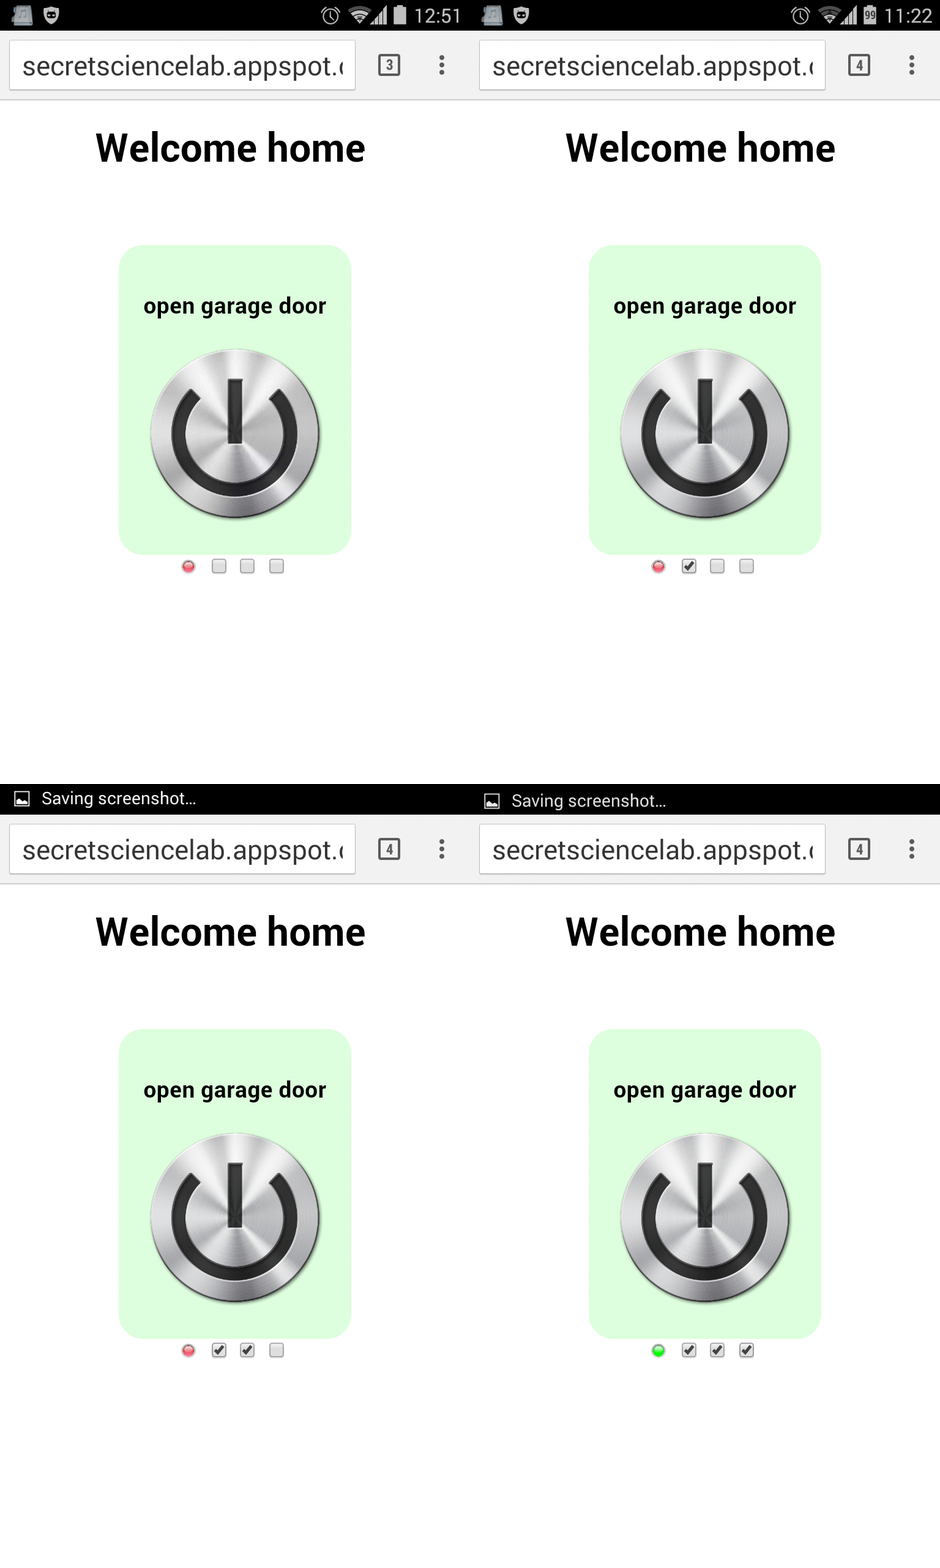 Smartphone UI screenshot. Just a big button. The three checkboxes below it are to arm the button. This is so I can’t accidentally press the big button.[/caption]
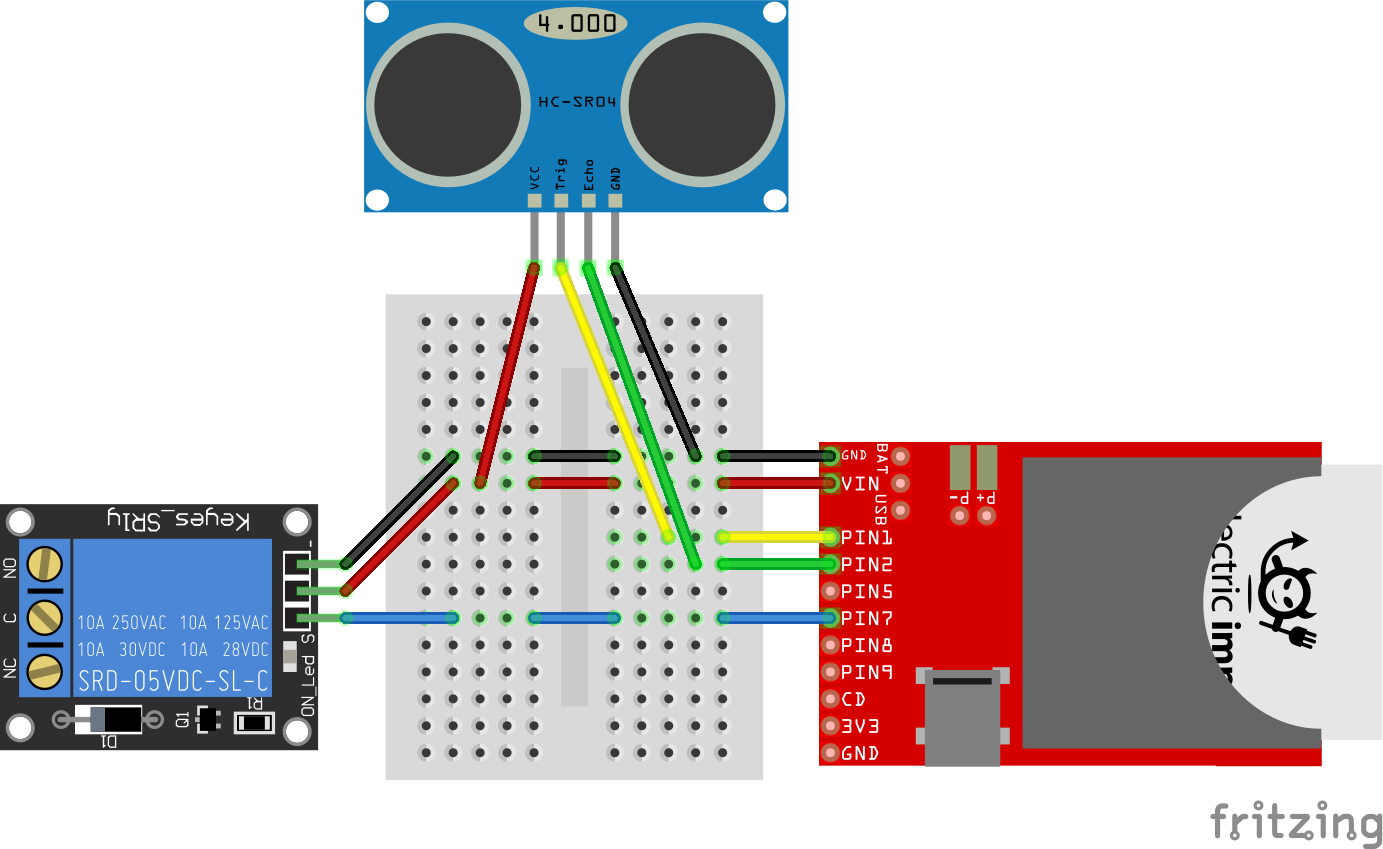
Circuit diagram
[caption id=”attachment_336” align=”alignnone” width=”300”]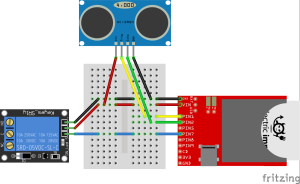 I drew this with Fritzing![/caption]
Electric Imp setup/prep
Solder male headers onto Imp
Electric Imp Agent code
garageDoorState <- "closed";

function requestHandler(request, response) {
  try {
    response.header("Access-Control-Allow-Origin", "*");

    if ("garageDoor" in request.query) {
        local code = request.query.garageDoor;
        local dataKey = request.query.dataKey;
        local url = "http://yourgaragedoorapp.appspot.com/rollcode"
          + "?verify=" + code + "&dataKey=" + dataKey;

        // Verify rolling code provided against the saved code in your webapp's DB
        // (and only allow authorized users to save rolling codes in DB).
        // This extra security measure is optional. If you just want to
        // open the door without extra checks, call:
        //    device.send("pulseDoor", code);
        http.get(url).sendasync(function(resp) {
            server.log(url);
            server.log(resp.body);
            local data = http.jsondecode(resp.body);
            if (!device.isconnected()) {
                server.log("garageDoor: Imp offline");
            }
            else if ("verify" in data && data.verify == "success") {
                device.send("pulseDoor", code);
            }
            else {
                server.log("garageDoor: Bad code " + code);
            }
        });
    }
    else if ("getStatus" in request.query) {
        device.send("getDoorState", "");
    }
    else if ("showStatus" in request.query) {
        response.send(200, garageDoorState);
        return;
    }

    // send a response back saying everything was OK.
    response.send(200, "OK");
  } catch (ex) {
    response.send(500, "Internal Server Error: " + ex);
  }
}

// register the HTTP handler
http.onrequest(requestHandler);

function saveDoorState(state) {
    garageDoorState <- state;
}

device.on("doorState", saveDoorState);
Electric Imp Device code
function pulseDoor(data) {
    server.log("PULSE DOOR START");
    doorSwitch.write(1);
    imp.wakeup(3, pulseDoorStop);
}
function pulseDoorStop() {
    server.log("PULSE DOOR STOP");
    doorSwitch.write(0);
}

function getDoorState(data) {
    range <- Ultrasonic(trig, echo);
    local isOpen = 0;
    if (range.read_cm() < 20) {
        isOpen = 1;
    }
    server.log("Door distance: " + range.read_cm() + " isOpen: " + isOpen);
    server.log("Door " + doorStateAsString(isOpen));
    agent.send("doorState", doorStateAsString(isOpen));
}
function doorStateAsString(state) {
    if (state == 1)
        return "open";

    return "closed";
}

class Ultrasonic {
    // consts
    static TO = 500; // timeout in ms

    // pins
    _trig   = null;
    _echo   = null;

    // aliased methods
    _tw     = null;
    _er     = null;
    _hu     = null;
    _hm     = null;

    // vars
    _es     = null; // echo start time
    _ee     = null; // echo end time

    constructor(trig, echo) {
        _trig = trig;
        _echo = echo;

        _hu   = hardware.micros.bindenv(hardware);
        _hm   = hardware.millis.bindenv(hardware);
        _tw   = _trig.write.bindenv(_trig);
        _er   = _trig.read.bindenv(_echo);
    }

    function read_cm() {
        local st = _hm(); // start time for timeout
        // Quickly pulse the trig pin
        _tw(0); _tw(1); _tw(0);

        // Wait for the rising edge on echo
        while (_er() == 0 && (_hm() - st) < TO);
        _es = _hu();

        // Time to the falling edge on echo
        while (_er() == 1 && (_hm() - st) < TO);
        _ee = _hu();

        //if ((_hm() - st) >= TO) return -1;
        return (_ee - _es)/58.0;
    }
}

trig <- hardware.pin1;
echo <- hardware.pin2;
doorSwitch <- hardware.pin7;

trig.configure(DIGITAL_OUT,0);
echo.configure(DIGITAL_IN);
doorSwitch.configure(DIGITAL_OUT, 0);
agent.on("pulseDoor", pulseDoor);
agent.on("getDoorState", getDoorState);

server.log("Imp online @ " + imp.getssid() + "!");
(Optional) rolling authentication code I made a Google AppEngine app to be a gatekeeper and for the smartphone UI to open/close the door. The idea is:
- Take advantage of AppEngine’s built-in authentication to control who can access your app
- When an authorized person taps “Open”, save a random “rolling code” into your web app’s DB
- Then, tell your Electric Imp to “Open” and pass it the rolling code you just generated
- When your Electric Imp Agent receives the “Open” command, it checks the received rolling code with your AppEngine webapp
- If the rolling code matches the latest code in the DB, the webapp destroys the code (so it cannot be reused) and the Imp Agent tells the Imp Device to open the door
If you want to go this route and need more info, email me at aaron@secretsciencelab.com. If enough of you want it I’ll put it here. I’m just too lazy right now!
Installation The hardest part is soldering header pins to the Imp, and soldering wires to the Ultrasonic sensor. But other than that, everything else is pretty much plug and play. That’s the beauty of using the Imp, the Keyes Relay and an Ultrasonic sensor. All the electronics are nicely packaged in each of them, so all you need to do is connect them with wires.
I stuffed everything into a small cardboard box and tied it to the frame of the garage door control box. I plugged the Imp’s USB adapter into the same outlet that powered the garage door control box. Lastly, I secured the Ultrasonic sensor to a bolt under the garage door rail using a twist-tie. Dirty, but simple!
Bonus (advanced)
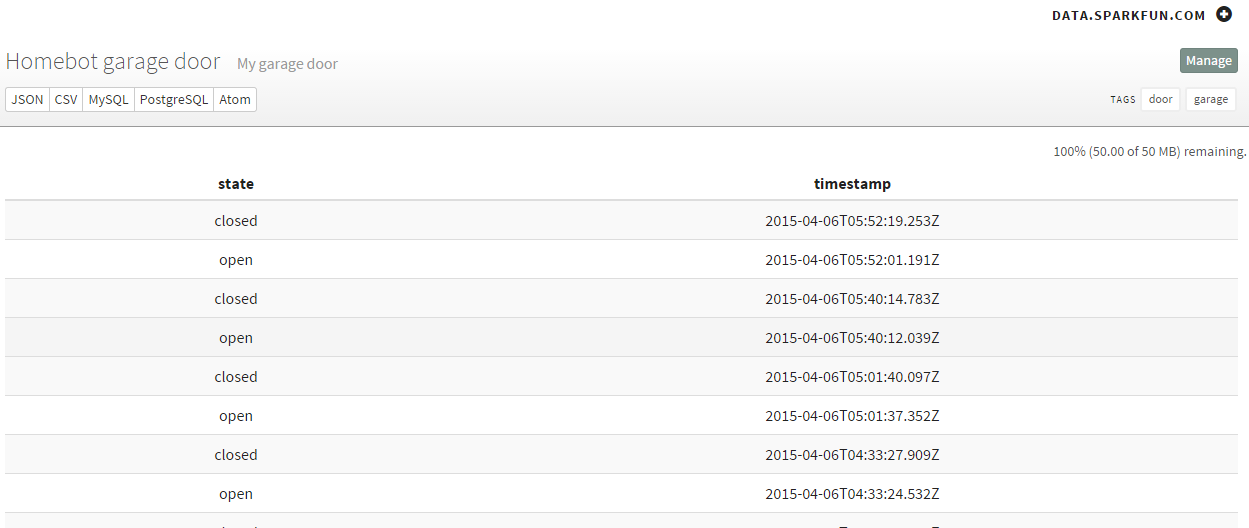
- Push your sensor data to data.sparkfun.com for free: [caption id=”attachment_354” align=”alignnone” width=”1000”]
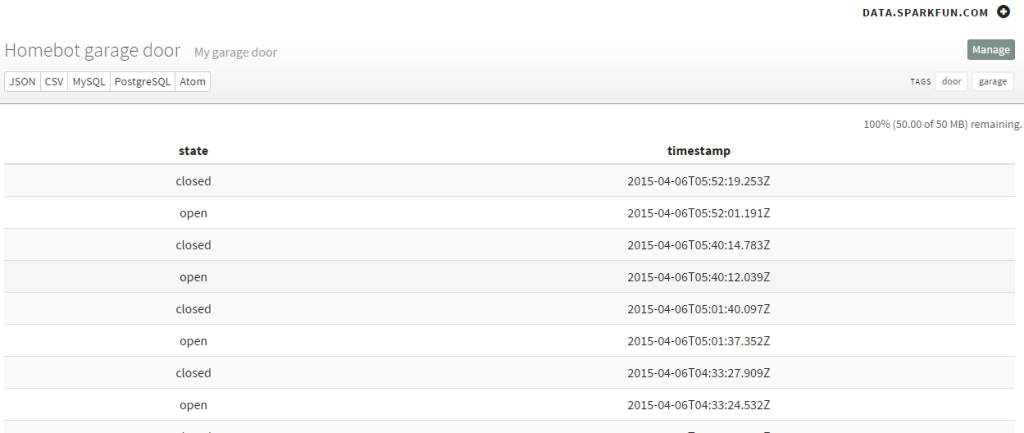 E.g., door open, door close[/caption]
- Convert your SparkFun CSV stream into an Atom RSS using my URL: https://secretsciencelab.com/wp-content/scripts/phant/feed.php?csv=http://data.sparkfun.com/output/YOUR_PUBLIC_KEY.csv&key=state (replace the bolded parts).
- Plug your Atom RSS URL above into IFTTT as a Feed recipe.
- Now you can tell IFTTT to: “If new Feed item, then do something.” E.g., “If my garage door opens or closes, text me.”
Happy hacking :)
aaron@secretsciencelab.com
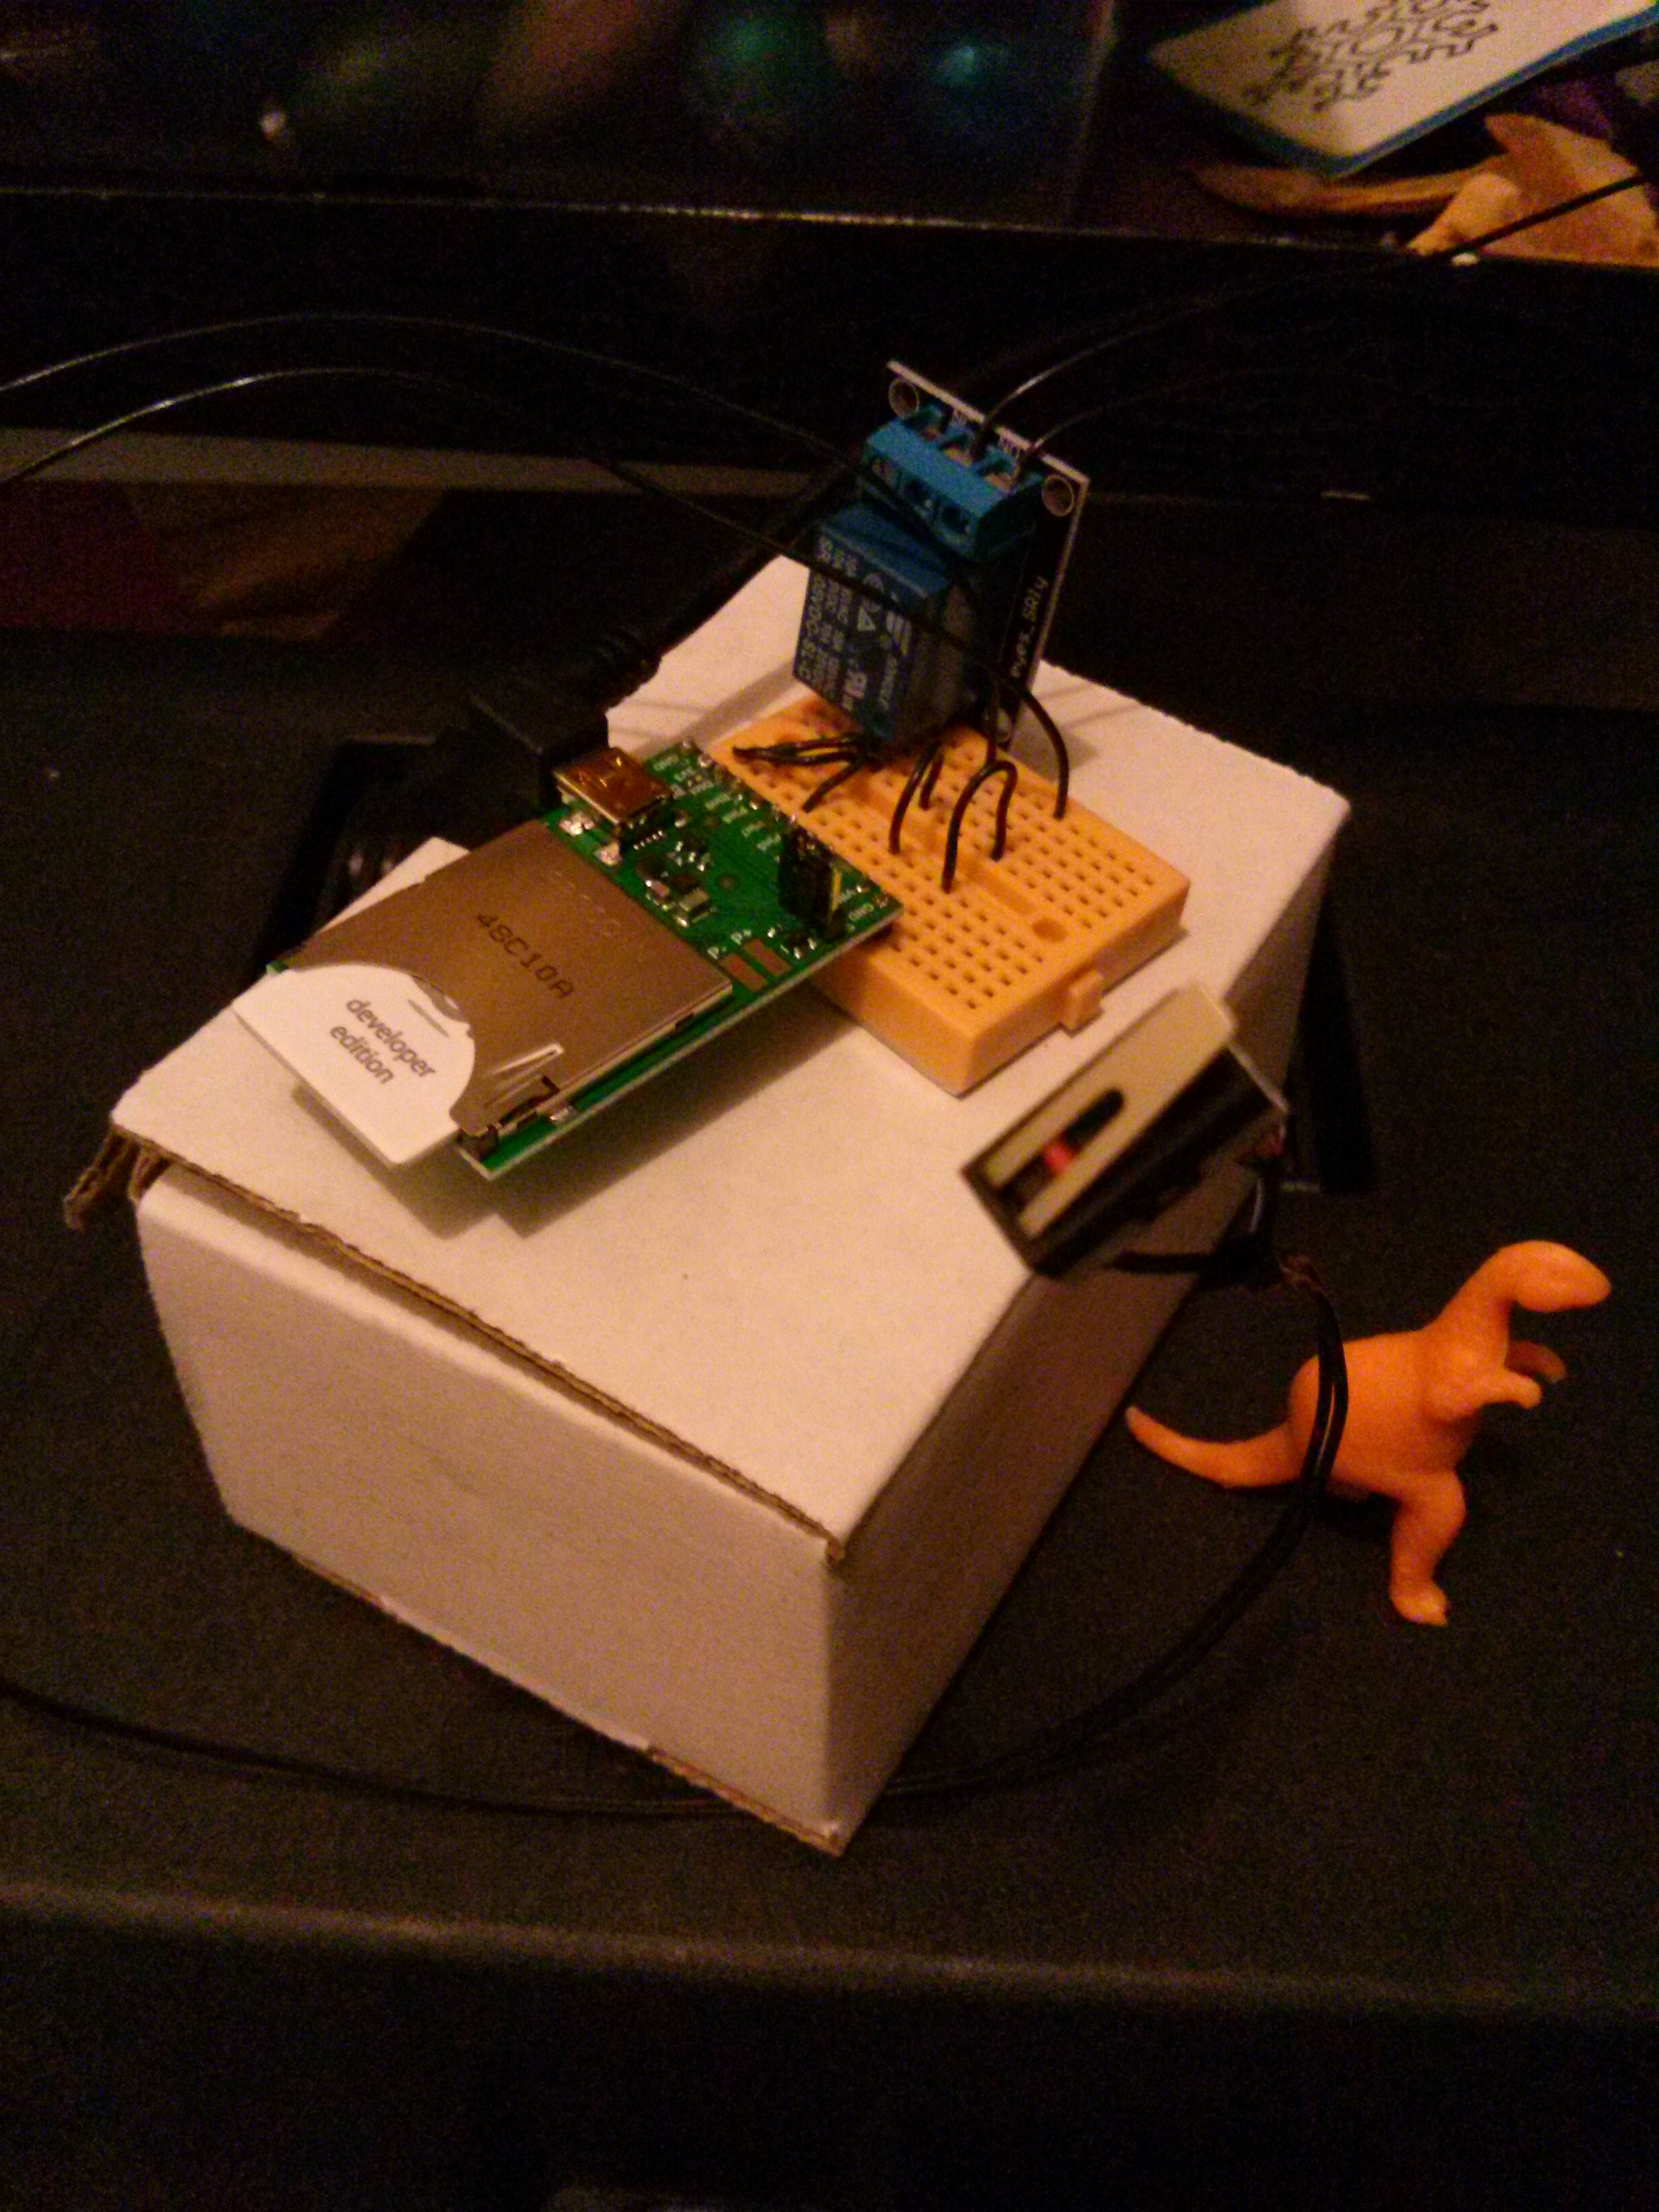 Mini breadboard ties everything together. The Imp is sitting in the April Breakout board. The April board’s soldered header pins plug into the breadboard. The blue thing is the relay with 3 pins in the breadboard. You see a switch in the picture but I replaced that with an Ultrasonic sensor. The problem with the switch was my garage door doesn’t always stop at the same place, so no switch was going to reliably trigger. On the other hand, the Ultrasonic sensor measures accurate distances up to 3m, so you can make a software switch that you can tune to perfection. Dinosaur for scale.[/caption]